Author name: Aravind Arumugam

Microsoft Azure Outage Shows How Fragile the Cloud Can Be

In the middle of Microsoft’s busy earnings day on 29 October 2025, the company’s Azure cloud service suffered a major outage that rippled around the world. Microsoft later said the disruption was caused by an inadvertent configuration change that broke its Azure Front Door (AFD) content‑delivery network theverge.com. This single mistake triggered a cascade of problems that knocked out popular services like Microsoft 365, Xbox Live and even mobile apps for Starbucks and Costco theverge.com. The incident, which lasted for hours, highlighted just how dependent modern businesses are on cloud platforms and how easily those platforms can fail. When did the outage start? The trouble began in the late afternoon for European users and mid‑morning for Americans. Microsoft’s status page said that starting around 16:00 UTC (9 a.m. Pacific) on 29 October, customers using Azure Front Door “may have experienced latencies, timeouts, and errors” theverge.com. Cisco’s ThousandEyes monitoring service noticed similar problems at around 15:45 UTC, observing global HTTP timeouts and elevated packet loss at the edge of Microsoft’s network thousandeyes.com. In other words, requests simply stopped reaching Microsoft’s servers. What caused the problem? Azure’s engineers quickly identified a misconfiguration. They wrote that an “inadvertent configuration change was the trigger event” for the outage theverge.com. Instead of a cyber‑attack or a hardware failure, someone had changed a setting that broke the AFD service, which acts as a gateway for many Microsoft and customer websites. To stop things getting worse, Microsoft blocked all further changes to the service and rolled back to the last known good configuration geekwire.com. Which services were affected? The outage cascaded through Microsoft’s own products and many external customers: Microsoft 365 and Office: At 12:25 p.m. Eastern time, Microsoft 365’s status account said it was investigating reports of access problems theverge.com. An update half an hour later noted that internal network issues were causing connectivity problems and that traffic was being rerouted to restore service theverge.com. Xbox and gaming: The Xbox support team later said that gaming services had recovered, but some players needed to restart their consoles to reconnect theverge.com. Third‑party websites and apps: Because many organisations build their sites on Azure, the outage knocked out apps for Starbucks, Costco, Kroger and other retailers theverge.com. Downdetector, a site that tracks outages, recorded problems for Office 365, Minecraft, Xbox Live, Copilot, and many other services kbtx.com. Airlines and critical infrastructure: Alaska Airlines and Hawaiian Airlines told customers that key systems, including their websites and online check‑in, were disrupted theverge.com. Alaska Airlines later explained that it stood up backup infrastructure and was gradually restoring services, asking passengers to see an agent at the airport if they couldn’t check in online news.alaskaair.com. The outage even affected Vodafone UK and London’s Heathrow Airport hindustantimes.com. How did Microsoft respond? Microsoft’s status page updates provide a timeline of its response. After confirming the configuration error, Azure engineers blocked further changes and rolled back to the previous configuration state geekwire.com. By 7:40 p.m. Eastern (23:40 UTC), Microsoft said the AFD service was running at 98 % availability and that most affected customers were seeing improvements theverge.com. The team predicted full mitigation by 00:40 UTC on 30 October theverge.com and kept working on the “tail‑end recovery” for remaining customers. Microsoft did not immediately say who made the change or why proper safeguards failed. In an update posted at 12:22 p.m. Pacific, the company said it had deployed the “last known good” configuration and expected full recovery within four hours geekwire.com. In the meantime, it blocked all changes to Azure Front Door to prevent the problem from reoccurring geekwire.com. Why was the impact so broad? Cloud outages are not new, but this one was especially disruptive because Azure Front Door handles Domain Name System (DNS) and content delivery functions for a huge number of services. When a misconfiguration broke AFD, it prevented successful connections to multiple Microsoft and customer services thousandeyes.com. Even an hour after the problem began, more than 18 000 users were reporting issues with Azure, according to the outage‑tracking site Downdetector hindustantimes.com. Reports gradually fell as Microsoft rolled out fixes, but the event underscored how many companies rely on a small number of cloud providers. This outage also came just over a week after a major Amazon Web Services (AWS) disruption that took down Fortnite, Alexa, Snapchat and other services theverge.com. With back‑to‑back failures at two of the world’s largest cloud providers, many businesses are questioning whether they have enough redundancy in their digital infrastructure. The takeaway The October 29 Azure outage shows how a single error can quickly ripple across the internet. A misconfigured setting in Microsoft’s cloud knocked out airlines, retailers and gaming services for hours theverge.com. Microsoft eventually rolled back the change and restored service, but the incident is a reminder that even the most sophisticated cloud platforms are prone to human mistakes. Companies that depend on these platforms may need to build more resilience and prepare backup plans so that one provider’s misstep doesn’t ground flights or stop customers from placing a coffee order.

Microsoft Azure Outage Shows How Fragile the Cloud Can Be Read More »

Exploring ChatGPT’s Atlas: The New AI-Powered Browser for MacOS

Hello everyone! Welcome back. We’ve seen many new internet browsers pop up lately—like Arc, Edge, and Opera. But now, the biggest name in AI, OpenAI, has made its own browser: ChatGPT Atlas, just for Mac computers. This is not a small add-on or a plugin. OpenAI built a full, new browser from the ground up. Atlas runs on the same engine as many others (called Chromium), but it’s special because it has the power of ChatGPT built right into its core. The AI doesn’t just help; it runs the show. What is ChatGPT Atlas? Think of Atlas not just as a place to visit websites, but as a smart digital helper. It uses the power of ChatGPT to give you a smooth, personal experience on the internet. Getting started is easy: you download it, install it, and log in with your ChatGPT account. Right away, you get a personalized browsing experience. Cool Things Atlas Can Do Atlas comes with many new features: Smarter Search: It gives you clear, organized answers instead of just a list of links. Built-in Writing Help: It can help you write emails and notes right where you are. Browser Memories: It learns your habits to help you better next time. The most powerful feature is “Agent Mode.” Trying Out Agent Mode   Agent Mode lets ChatGPT work for you. It can handle hard, multi-step jobs without you needing to click everything yourself. As I show in the video: “Imagine commanding your browser to find the cheapest flight from Birmingham to Edinburgh, and in minutes, you have recommendations presented, complete with prices.” The browser acts like a smart assistant! A quick, important note: Be very careful using Agent Mode on banking or finance websites. It’s built to protect you, but you should never risk sensitive money information. How Atlas Boosts Your Work   Atlas helps you get things done faster: Video Summaries: If you don’t have time to watch a long video, you can use the “Ask ChatGPT” button. It gives you a quick summary of the video’s main points. Finance Info: It can quickly look at a financial news page and summarize the biggest market gains and losses of the day. Creating Pages (Canvas): You can even use the Canvas feature to quickly make a simple landing page for your projects or business. Final Thoughts   By putting AI directly into the browser, ChatGPT Atlas changes what we expect from our computer tools. It’s an integrated partner in your daily web use. For people who already use ChatGPT Plus or Pro and have a Mac, Atlas is definitely worth trying out as your main browser. See all the features and the Agent Mode in action in my full video: https://www.youtube.com/embed/2ZjVyypuTWo   Stay tuned for more updates on this exciting new tool. This is Mr. ViiND, and I’ll see you next time!

Exploring ChatGPT’s Atlas: The New AI-Powered Browser for MacOS Read More »

Inbrowser-RDP-mr.viind-blog cloudflare

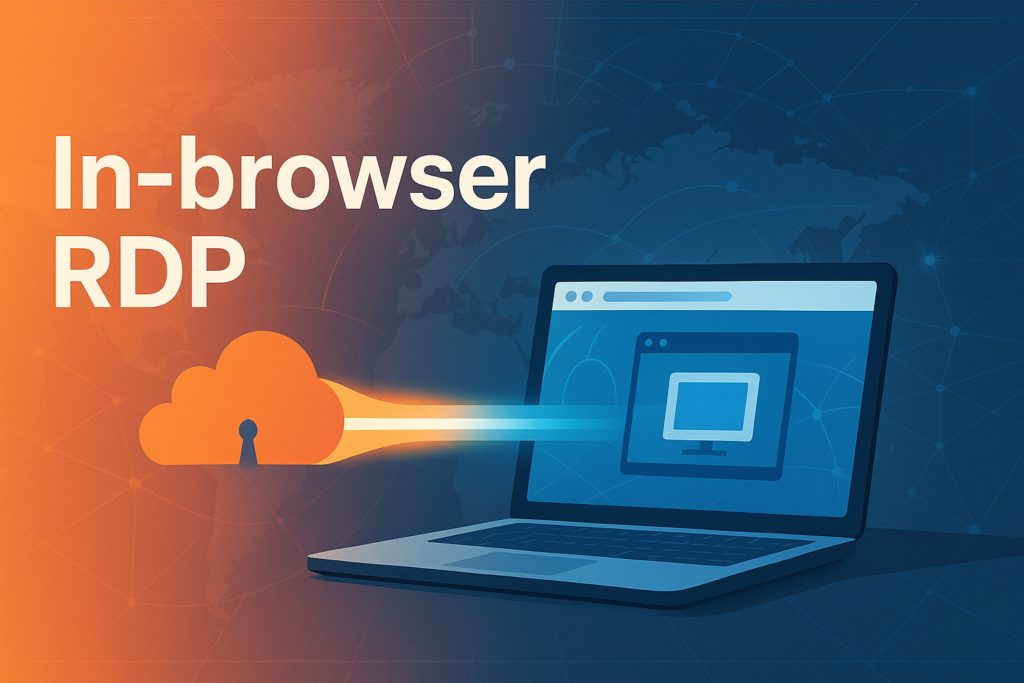
In-browser RDP with Cloudflare Tunnel — Complete practical setup on (Tested and working on windows 11)

This is a hands-on, step-by-step guide post you can use to publish a Windows host with in-browser RDP using Cloudflare Tunnel and Cloudflare Zero Trust Access. Read it once, then follow each step. I wrote this so you can copy, paste, edit small values, and run a single PowerShell script at the end to finish the setup on Windows. Short summary I had my domain registered with hostinger so  i moved my domain DNS management into Cloudflare, point your domain (update nameservers at Hostinger), create a Cloudflare Tunnel, install the tunnel agent on Windows, configure the tunnel to route a public hostname to an internal RDP host, create a Zero Trust Access app (RDP with browser rendering), and test from a browser. Step 0 — Key information you should have A domain name (example: yourdomain.com). Cloudflare account with Zero Trust (Access) enabled. Hostinger account where your domain currently has DNS (so you can change nameservers). Windows machine where you will run cloudflared (Administrator access required). Private IP of the RDP target (example: 192.168.1.100), and RDP enabled on that target. Step 1 — Add your domain to Cloudflare and switch nameservers (I had my domain registerd on Hostinger) Log in to Cloudflare and add your domain (the dashboard will give you two Cloudflare nameservers). Log in to Hostinger, find your domain’s DNS / Nameservers section, and replace the current nameservers with the two Cloudflare nameservers Cloudflare gave you. Save changes. Wait for Cloudflare to accept the domain (it typically takes a few minutes to a few hours to propagate). You can check the Cloudflare dashboard until the domain shows as active on Cloudflare. Once active, Cloudflare manages DNS for your domain and you will perform public hostname mapping within the Cloudflare dashboard on this process, later. (no more changes needed at Hostinger for the hostname you will use). Step 2 — Prepare Zero Trust and create a Tunnel Do this in the Cloudflare dashboard under Zero Trust (sometimes called Cloudflare for Teams / Access → Tunnels). The UI may show options to create tunnels or generate a one-time service install token. Follow the UI to create the tunnel and either: Generate a one-time service install token (recommended for unattended Windows service install), or Create the tunnel and note the Tunnel UUID (if you prefer interactive CLI login later). Also in Zero Trust you will create network routing entries (CIDR / routes) so Cloudflare knows which internal addresses the tunnel can reach: Under the Zero Trust / Network or Tunnels area, add the internal network routes (CIDR ranges) or specific IPs that the tunnel should be able to reach — for example your LAN range or the private IP of the RDP host (e.g., 192.168.1.0/24 or the single IP 192.168.1.100). Create any network policies required to allow the tunnel to access those CIDR ranges from the Cloudflare side (these options vary by UI but are usually grouped under “Network” or “Private networks”). Step 3 — Create targets and allow admin users Still under Zero Trust, register the internal target(s) you will access (the RDP host IP). This tells Cloudflare where to forward inbound session traffic that arrives via the tunnel. Create a Zero Trust policy or Access rule that allows your admin account(s) to use the application. This is done in Cloudflare Access / Policies — add an “Allow” policy that specifies the Cloudflare user or group who can open the RDP app. Step 4 — Configure a public hostname (Public Hostnames / DNS) You will map a hostname that your users can visit in the browser to reach the tunnel and then the RDP target. Go to Zero Trust → Tunnels → your tunnel → Public hostnames (or Public Hostnames / DNS mapping area). Add a public hostname, for example rdp.yourdomain.com. Set the service to the internal RDP target: rdp://192.168.1.100:3389 (replace with your private IP and port if different). Save. Cloudflare will create the correct CNAME behind the scenes (it points the public hostname to [TUNNEL_UUID].cfargotunnel.com), or you can create that CNAME in Cloudflare DNS manually if needed. Step 5 — Create an Access application (Browser RDP) In Zero Trust → Access → Applications, click Add application. Set Application domain to rdp.yourdomain.com. Choose Application type: Self-hosted and select RDP. Enable Browser rendering (this renders the RDP session in the browser). Create an Allow policy that includes your Cloudflare user (email) or a group that contains the admin accounts. Save the application. Step 6 — Install cloudflared and run the tunnel on Windows Below is the one-shot PowerShell script I use. Edit the top variables ($ServiceToken, $tunnelUUID, $hostname, $targetIP) to match your values, then copy the full code in one-go, paste it on powershell, hit enter. $UseToken = $true $ServiceToken = ” $tunnelUUID = ‘xxxxxxxx-xxxx-xxxx-xxxx-xxxxxxxxxxxx’ $hostname = ‘rdp.yourdomain.com’ $targetIP = ‘192.168.1.100’ $targetPort = 3389 $exeDir = ‘C:\Program Files\cloudflared’ $exePath = Join-Path $exeDir ‘cloudflared.exe’ $sysCfgDir = ‘C:\Windows\System32\config\systemprofile\.cloudflared’ $configPath = Join-Path $sysCfgDir ‘config.yml’ $credPath = Join-Path $sysCfgDir ($tunnelUUID + ‘.json’) If (-not ([Security.Principal.WindowsPrincipal] [Security.Principal.WindowsIdentity]::GetCurrent()).IsInRole([Security.Principal.WindowsBuiltinRole]::Administrator)) { Write-Error ‘Run PowerShell as Administrator’; Break } New-Item -ItemType Directory -Force -Path $exeDir | Out-Null $downloadUrl = ‘https://github.com/cloudflare/cloudflared/releases/latest/download/cloudflared-windows-amd64.exe’ if (-not (Test-Path $exePath)) { try { Invoke-WebRequest -Uri $downloadUrl -OutFile $exePath -UseBasicParsing -ErrorAction Stop; Unblock-File $exePath -ErrorAction SilentlyContinue } catch { Write-Error “Download failed: $downloadUrl”; Break } } & “$exePath” –version Get-WmiObject Win32_Service | Where-Object { $_.PathName -and ($_.PathName -match ‘cloudflared’) } | ForEach-Object { try { Stop-Service -Name $_.Name -Force -ErrorAction SilentlyContinue } catch {} sc.exe delete $_.Name | Out-Null } taskkill /IM cloudflared.exe /F 2>$null New-Item -ItemType Directory -Force -Path $sysCfgDir | Out-Null if ($UseToken) { if (-not $ServiceToken) { Write-Error ‘Set $ServiceToken’; Break } & “$exePath” service install $ServiceToken Start-Sleep -Seconds 2 } $possibleCreds = @(“$env:USERPROFILE\.cloudflared\$tunnelUUID.json”, “C:\ProgramData\cloudflared\$tunnelUUID.json”, (Join-Path $exeDir ($tunnelUUID + ‘.json’))) $found = $possibleCreds | Where-Object { Test-Path $_ } | Select-Object -First 1 if ($found) { Copy-Item -Path $found -Destination $credPath -Force; Write-Host “Copied credentials to $credPath” } else { Write-Host “No credential file found; service may be running with token mode.” } $ingressService

In-browser RDP with Cloudflare Tunnel — Complete practical setup on (Tested and working on windows 11) Read More »

How to Download Your CV from LinkedIn

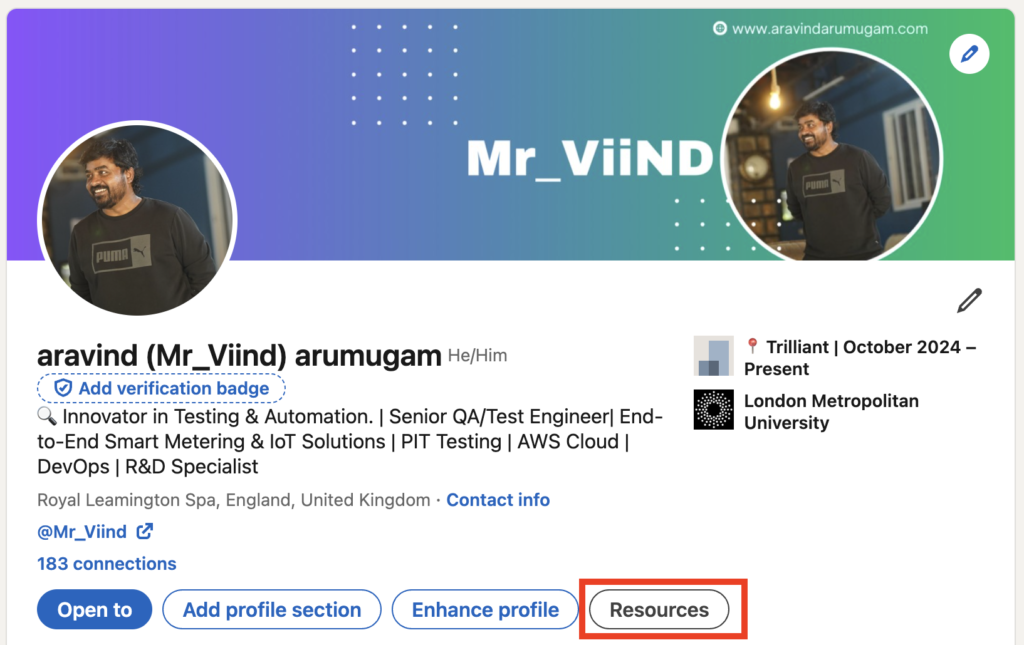
LinkedIn allows you to save your profile as a PDF resume. This feature is available on the desktop version of LinkedIn, not the mobile app. Step 1: Access Your Profile Sign in to LinkedIn. Go to your profile page by clicking the “Me” icon in the top navigation bar, then select “View profile”. Step 2: Locate the “Resources” Button On your profile page, find the “Resources” button below your profile picture and headline.   Step 3: Select “Save to PDF” Click “Resources” to see a dropdown menu. Choose “Save to PDF”.   Step 4: Download and Save After selecting “Save to PDF,” LinkedIn will prepare your profile as a PDF. You’ll see a message “Preparing PDF, your download will begin shortly”. The PDF will then download to your computer’s default download location. Important Notes: The downloaded PDF includes your profile summary, work experience, education, and skills. You can also save another LinkedIn member’s profile as a PDF. The “Save to PDF” option primarily supports English profiles and language settings. Profiles in other languages like Simplified Chinese, Japanese, Korean, Russian, Arabic, and Thai may not work correctly. This feature may not be available to all members.

How to Download Your CV from LinkedIn Read More »

Introducing Gemini CLI: Google’s Open Source AI Agent for Terminal Users

For developers, the terminal is home—a place where efficiency and flexibility matter most. Google’s latest release, Gemini CLI, is set to transform how you work in the command line by bringing advanced AI capabilities directly into your workflow. Whether you’re a hobbyist or a seasoned professional, Gemini CLI offers a lightweight, powerful, and open-source solution for coding, automation, and so much more. 🎥 See Gemini CLI in Action Want to watch a hands-on demo and real-world use cases? Check out this in-depth video walkthrough: ▶️ Watch on YouTube: https://youtu.be/cxnNuVbDZUc What is Gemini CLI? Gemini CLI is Google’s open-source AI agent designed to run directly in your terminal. Powered by Gemini 2.5 Pro, it gives you natural language access to a wide range of AI features—editing files, writing code, automating tasks, generating content, and even performing deep research—all without leaving your shell12. Unlike traditional CLI tools that require precise syntax, Gemini CLI lets you interact using plain English (or any supported language). You can ask it to analyze code, clone repositories, deploy apps, summarize content, or even manage complex workflows conversationally23. Why Gemini CLI Stands Out Completely Free for Individuals: Just log in with your personal Google account for a free Gemini Code Assist license. No credit card required, and you get up to 1,000 requests per day and 60 requests per minute—the industry’s largest free allowance21. Open Source and Transparent: Licensed under Apache 2.0, Gemini CLI is fully open source. Developers are encouraged to inspect, contribute, or adapt the code for their own needs13. Powerful Model Access: You get Gemini 2.5 Pro, with a massive 1 million token context window—enough to understand and edit entire codebases at once21. Multimodal and Extensible: Supports Model Context Protocol (MCP) for extensions, media generation (with Imagen, Veo, Lyria), and built-in Google Search grounding for real-time information213. Cross-Platform: Works on Mac, Windows, and Linux. Key Features Conversational Coding: Write, edit, and debug code using natural language. Content Generation: Summarize documents, generate reports, or create new content from PDFs or sketches. Automation: Automate DevOps tasks, manage pull requests, and handle complex Git workflows. Web Search Integration: Ground your prompts with real-time web data for research and fact-checking. Customizable and Scriptable: Tailor prompts, automate repetitive tasks, and integrate Gemini CLI into your scripts or toolchain3. Real-World Examples Here’s what you can do with Gemini CLI: Clone and Analyze Repos: “Clone this GitHub repo and list its main components.” Build and Deploy Apps: “Generate a Node.js site from this PDF and deploy it on Cloud Run.” Automate Media Tasks: “Convert all images in this directory to PNG and rename them by date.” Summarize Code Changes: “Give me a summary of all changes in the repo from the last 7 days.” Create Content: “Draft a blog post about AI in developer tools.” In Google’s own demo, Gemini CLI cloned its own repository, generated a Node.js site, and deployed it to Cloud Run—all while pausing for human approval when needed2. How to Get Started Install Node.js (version 18 or higher). Install Gemini CLI globally: text npm install -g @google/gemini-cli Or run directly with npx: text npx @google/gemini-cli Start Gemini CLI: text gemini Authenticate with your Google account to unlock the free tier. Pick your color theme and start prompting! For advanced usage or higher limits, you can use an API key from Google AI Studio or Vertex AI123. Pro Tips Use the 1M Token Context: Feed large files or entire repos for deep analysis and suggestions. Combine with Other CLI Tools: Pipe Gemini CLI’s output into your favorite utilities for even more power. Customize Prompts: Adjust system prompts and instructions to match your workflow or project needs. Automate Repetitive Tasks: Script Gemini CLI for batch operations or routine DevOps chores. Community and Contribution Gemini CLI is hosted on GitHub, where you’ll find documentation, issue tracking, and a growing community. Google encourages developers to contribute, suggest features, and help shape the tool’s future13. Final Thoughts Gemini CLI is more than just a coding assistant—it’s a versatile, open, and powerful AI agent built for the terminal. With unmatched free access, rich extensibility, and the backing of Google’s latest AI models, it’s poised to become an essential tool for developers everywhere. Ready to try it? Official Google Blog Announcement Gemini CLI on GitHub Watch the full video demo Streamline your workflow, automate tasks, and unlock new productivity with Gemini CLI—right from your terminal.

Introducing Gemini CLI: Google’s Open Source AI Agent for Terminal Users Read More »

Mr_Viind Youtube Channel Esp32 pinouts

ESP32 DevKit Pinout & GPIO Guide: Everything You Need to Know

The ESP32 DevKit is one of the most popular microcontroller boards for DIY electronics, IoT, and embedded projects. If you’re starting out with the ESP32 or want a detailed reference for its pins and features, this guide is for you! Here, we’ll break down the ESP32 DevKit pinout, technical specs, and practical tips so you can make the most of your board. What is the ESP32 DevKit? The ESP32 DevKit is built around the ESP32-WROOM-32 microcontroller—a powerful 32-bit dual-core chip with integrated Wi-Fi and Bluetooth 4.2. It’s designed for flexibility, featuring a wide range of GPIOs, analog and digital interfaces, and support for various communication protocols. Key Specs CPU: Dual-core Xtensa LX6, 160–240 MHz RAM: 520 KB SRAM Flash: 4–16 MB external (QSPI) Wi-Fi: 2.4 GHz, 802.11 b/g/n Bluetooth: v4.2 (Classic + BLE) Operating Voltage: 3.3V (regulated from USB or VIN) ESP32 DevKit Board Layout Power & Basic Components Micro USB Connector: Main power and programming interface. LDO Voltage Regulator: Converts 5V USB/VIN to 3.3V for the ESP32. Power LED (Red): Indicates board is powered. User LED (Blue, GPIO2): Handy for testing and beginner projects. EN (Enable) Button: Resets the board. BOOT Button: Used for programming/flashing modes. ESP32 DevKit Pinout Overview Power Pins VIN: 5V input (if not using USB) 3.3V: Regulated output for sensors/modules GND: Ground GPIO Pins Total GPIOs: Up to 30 available (not all are equal!) General Use: GPIO1, 3, 4, 12–19, 21–23, 25–27, 32, 33 are safe for digital I/O Input-Only Pins GPIO34, GPIO35, GPIO36, GPIO39: Input-only, no output or internal pull-up/pull-down. Use for sensors, not for driving LEDs or relays. Pins to Avoid GPIO6–11: Used for onboard SPI flash. Do not use for your projects. Strapping Pins (Special Boot Functions) GPIO0, GPIO2, GPIO4, GPIO5, GPIO12, GPIO15: These affect boot mode. Don’t connect devices that change their state at boot, or you may have trouble uploading code. Analog & Special Function Pins ADC (Analog to Digital Converter) 18 channels (12-bit): ADC1: GPIO32–39 (use these for analogRead with Wi-Fi) ADC2: GPIO0, 2, 4, 12–15, 25–27 (not available for analogRead when Wi-Fi is active) DAC (Digital to Analog Converter) GPIO25 (DAC1), GPIO26 (DAC2): 8-bit analog output. PWM (Pulse Width Modulation) 16 channels: Any output-capable GPIO (except 34–39) can be used for PWM—great for LEDs and motors. Touch Sensors 10 capacitive touch pins: T0 (GPIO4), T1 (GPIO0), T2 (GPIO2), T3 (GPIO15), T4 (GPIO13), T5 (GPIO12), T6 (GPIO14), T7 (GPIO27), T8 (GPIO33), T9 (GPIO32) RTC GPIOs Some GPIOs are routed to the RTC subsystem for ultra-low-power wake-up (deep sleep). Communication Interfaces UART (Serial) Up to 3 UARTs: UART0: GPIO1 (TX), GPIO3 (RX) [default for programming] UART2: GPIO17 (TX), GPIO16 (RX) UART1: GPIO9, GPIO10 (avoid—used by SPI flash) I2C Default: GPIO21 (SDA), GPIO22 (SCL) Can be reassigned to other output-capable GPIOs. SPI VSPI: MOSI (GPIO23), MISO (GPIO19), SCK (GPIO18), CS (GPIO5) HSPI: MOSI (GPIO13), MISO (GPIO12), SCK (GPIO14), CS (GPIO15) Note: GPIO6–11 are reserved for flash and should not be used. Practical Tips & Warnings Maximum current per GPIO: 40mA (absolute max; keep below 20mA for safety) All GPIOs can be used for interrupts Input-only pins: GPIO34–39 (no output, no pull-up/pull-down) ADC2 pins: Not available for analogRead() when Wi-Fi is active—use ADC1 pins for analog sensors if Wi-Fi is needed. Strapping pins: Avoid connecting devices that may interfere with boot mode. Powering: Use VIN (5V) or 3.3V pin (with regulated supply). If using a battery, ensure enough current and stable voltage. ESP32 DevKit Pinout Cheat Sheet GPIO Safe to Use? Notes 0 With caution Strapping pin, must be LOW for flashing 1 TX0 Serial output at boot 2 Yes Onboard LED, strapping pin 3 RX0 Serial input at boot 4 Yes ADC2, touch, strapping pin 5 Yes SPI CS, strapping pin 6–11 NO Used by SPI flash, don’t use 12 With caution Strapping pin, must be LOW at boot 13–19 Yes General use, some are SPI/HSPI 21–23 Yes I2C default (21=SDA, 22=SCL), SPI MOSI 25–27 Yes ADC2, DAC, touch 32–33 Yes ADC1, touch 34–39 Input only No output, no pull-up/pull-down Conclusion The ESP32 DevKit is a versatile, feature-packed board suitable for everything from simple sensor projects to advanced IoT applications. Understanding the pinout is key to unlocking its full potential and avoiding common pitfalls. Bookmark this guide and refer back whenever you’re wiring up a new project!

ESP32 DevKit Pinout & GPIO Guide: Everything You Need to Know Read More »

16 Must-Have AI Tools for Every Professional in 2025

AI is no longer just a buzzword — it’s becoming an everyday tool for working professionals. Whether you’re a student, freelancer, content creator, teacher, developer, or small business owner, the right AI tools can save you time, help you work smarter, and unlock creative ideas. Recently, I found a great video that shows 16 powerful AI tools you should know about in 2025. The video is short and practical, and I’ve also listed all the tools below with direct links so you can explore them easily. Watch the full video here:https://www.youtube.com/watch/356Zl12rgeU 16 Useful AI Tools for Professionals in 2025 Google AI StudioWebsite: https://aistudio.google.com/A real-time learning assistant that helps you with on-screen tutoring while you work or study. Google Gemini Deep ResearchWebsite: https://gemini.google/overview/deep-research/Helps you research smarter by summarising insights from over 100 sources. Notebook LMWebsite: https://notebooklm.google/Reads your documents and creates learning materials, summaries, or notes from them. Napkin AIWebsite: https://www.napkin.ai/Instantly converts your thoughts into diagrams, infographics, and simple animations. Photo AI (Fotor)Website: https://www.fotor.com/A beginner-friendly photo and video editing tool with features like background removal and enhancement. Replicate AIWebsite: https://replicate.com/Run AI models like image or video generators in the cloud without needing a powerful computer. Pinokio AIWebsite: https://pinokio.computer/Lets you install AI tools with one click — no technical skills required. TubeMagicWebsite: https://tubemagic.com/Predicts what kind of YouTube video might go viral based on your past content and trends. Guide AIWebsite: https://guide-ai.com/Automatically creates step-by-step tutorials from your content or processes. Sono AI (Suno)Website: https://suno.com/Generates original songs using AI. Just give it your lyrics or vibe, and it creates the music. Temper AIWebsite: https://www.tempor.ai/Make royalty-free music for your videos, presentations, or content — powered by AI. Gamma AIWebsite: https://gamma.app/Create modern and clean presentations in seconds using just your ideas or a topic. Cursor AIWebsite: https://www.cursor.com/A no-code tool to build apps using plain English descriptions. Wizard AI (Uizard)Website: https://uizard.io/Quickly create UI/UX design mockups from simple text input. Perplexity AIWebsite: https://www.perplexity.ai/A research assistant that gives fact-based, cited answers with a clean and structured format. Otter AIWebsite: https://otter.ai/Transcribes meetings and gives summaries, making remote work and teamwork easier. Why You Should Explore These Tools Save hours of work by automating tasks Improve quality of writing, design, and content Create professional output even without deep technical skills Most of these tools offer free plans to get started Whether you’re building a personal brand, running a business, or just looking to stay ahead in your field, these tools are worth checking out.

16 Must-Have AI Tools for Every Professional in 2025 Read More »

DeepSeek-VL2: The Next Generation of Vision-Language Models

DeepSeek-VL2 is a cutting-edge Vision-Language Model series designed to redefine how AI interacts with multimodal data. Built with a Mixture-of-Experts (MoE) architecture, it offers unparalleled performance and computational efficiency. The model is highly capable across various advanced tasks such as visual question answering, OCR, document analysis, and data interpretation from charts and tables. This blog delves into the technical details of DeepSeek-VL2 and its powerful capabilities, based on its official research and design. I’ve also conducted a detailed professional test of the model’s capabilities, which you can watch on my YouTube channel. The links to test scenarios for specific features are included throughout this post. Key Features of DeepSeek-VL2 Dynamic Tiling Strategy One of the core innovations in DeepSeek-VL2 is its dynamic tiling strategy, which ensures efficient processing of high-resolution images with varying aspect ratios. This feature divides images into smaller, manageable tiles, allowing for detailed processing without losing essential visual information. 📺 Watch the test case on Dynamic Tiling: [YouTube Link for Dense Scene QA Test] Multi-Head Latent Attention and MoE Architecture DeepSeek-VL2 leverages Multi-Head Latent Attention to compress image and text representations into compact vectors. This design enhances processing speed and accuracy. Its Mixture-of-Experts architecture uses sparse computation to distribute tasks among expert modules, which improves scalability and computational efficiency. 📺 Watch the test case on Object Localization: [YouTube Link for Object Localization Test] Vision-Language Pretraining Data The training process of DeepSeek-VL2 uses a rich combination of datasets such as WIT, WikiHow, and OBELICS, along with in-house datasets designed specifically for OCR and QA tasks. This diversity ensures the model performs well in real-world applications, including multilingual data handling and complex visual-text alignment. 📺 Watch the test case on OCR Capabilities: [YouTube Link for OCR Test] Applications and Use Cases DeepSeek-VL2 excels in several practical applications: General Visual Question Answering: It provides detailed answers based on image inputs, making it ideal for complex scene understanding. OCR and Document Analysis: The model’s ability to extract text and numerical information from documents makes it a valuable tool for automated data entry and analysis. Table and Chart Interpretation: Its advanced reasoning enables the extraction of meaningful insights from visualised data like bar charts and tables. 📺 Watch the test case on Chart Interpretation: [YouTube Link for Chart Data Interpretation Test] 📺 Watch the test case on Visual Question Answering: [YouTube Link for General QA Test] Training Methodology The model’s training involves three critical stages: Vision-Language Alignment: This phase aligns the visual and language encoders, ensuring seamless interaction between both modalities. Pretraining: A diverse set of datasets is used to teach the model multimodal reasoning and text recognition. Supervised Fine-Tuning: Focused on improving the model’s instruction-following abilities and conversational accuracy. 📺 Watch the test case on Multi-Image Reasoning: [YouTube Link for Multi-Image Reasoning Test] Benchmarks and Comparisons DeepSeek-VL2 has been benchmarked against state-of-the-art models like LLaVA-OV and InternVL2 on datasets such as DocVQA, ChartQA, and TextVQA. It delivers superior or comparable performance with fewer activated parameters, making it a highly efficient and scalable model for vision-language tasks. 📺 Watch the test case on Visual Storytelling: [YouTube Link for Visual Storytelling Test] Conclusion DeepSeek-VL2 represents a leap forward in the development of Vision-Language Models. With its dynamic tiling strategy, efficient architecture, and robust training process, it is well-suited for a range of multimodal applications, from OCR and QA to chart interpretation and beyond. While the model excels in many areas, there is still potential for improvement in creative reasoning and storytelling. Overall, DeepSeek-VL2 stands out as a reliable, efficient, and versatile tool for researchers and developers alike. Resources To explore DeepSeek-VL2 in more detail, download the resources below: Presentation Slides as PDF prepared for youtube by Aravind Arumugam: @mr_viind_DeepSeek-VL2-Mixture-of-Experts-Vision-Language-Models-for-Advanced-Multimodal-Understanding-3Deepseek-VL2-official-document Official DeepSeek-VL2 Research Document: Deepseek-VL2-official-document Call to Action If you enjoyed this detailed overview of DeepSeek-VL2, make sure to check out the test scenarios and results on my YouTube channel. Don’t forget to subscribe, like on youtube, and share your thoughts in the comments in youtube. Let me know if there’s a specific AI model or technology you’d like me to explore next! Stay tuned for more deep dives into cutting-edge AI technologies!  

DeepSeek-VL2: The Next Generation of Vision-Language Models Read More »

How Google Chrome’s New IP Protection Feature Will Protect You from Online Tracking

Your IP address is a unique identifier that can be used to track your online activity. Advertisers and other third-party companies often use IP tracking to build profiles of users and target them with personalized ads. Google Chrome’s new IP Protection feature aims to protect users from this type of tracking by masking their IP addresses. When the feature is enabled, Chrome will route users’ traffic through a proxy server, which will hide their real IP address from the websites they visit. This feature is still under development, but it has the potential to significantly improve user privacy online. Here are some of the ways that the IP Protection feature can protect you from online tracking: Prevent cross-site tracking: Cross-site tracking is a technique that allows advertisers to track users across multiple websites. This is done by placing cookies on users’ browsers that can be used to identify them on different websites. The IP Protection feature can prevent cross-site tracking by masking the user’s IP address from websites. Protect your location: Your IP address can be used to determine your approximate location. Advertisers and other third-party companies often use this information to target users with location-based ads. The IP Protection feature can protect your location by masking your IP address. Make it more difficult to track your online activity: The IP Protection feature can make it more difficult for advertisers and other third-party companies to track your online activity. By masking your IP address, you can make it more difficult for them to build a profile of your online interests and target you with personalized ads. Overall, the IP Protection feature is a promising new privacy feature in Google Chrome. It has the potential to significantly reduce the amount of data that advertisers and other third-party companies can collect about you online. Additional details: The IP Protection feature will be opt-in at first, but Google plans to make it the default setting in the future. The feature will initially only work for specific domains, but Google plans to expand it to include more domains in the future. The IP Protection feature is not a replacement for a VPN. A VPN encrypts all of your traffic and routes it through a VPN server, while the IP Protection feature only masks your IP address for specific domains. How to enable the IP Protection feature: Open Google Chrome. Click the three dots in the top right corner of the window. Click “Settings.” Click “Privacy and security.” Under “Advanced,” click “Site Settings.” Click “Additional permissions.” Click “IP address.” Select “Block all requests.” Conclusion: Google Chrome’s new IP Protection feature is a promising new privacy feature that can help to protect users from online tracking. It is still under development, but it has the potential to significantly improve user privacy online.

How Google Chrome’s New IP Protection Feature Will Protect You from Online Tracking Read More »

Building a Docker container for my react.js app

To build a Docker container for React.js app, you can follow these steps: Create a Dockerfile. The Dockerfile is a text file that contains instructions for building a Docker image. Create a new file called Dockerfile in the root directory of your project. Add the following instructions to the Dockerfile: FROM node:16 WORKDIR /app COPY package.json . RUN npm install COPY . . EXPOSE 3000 CMD [“npm”, “start”] The FROM instruction specifies the base image that will be used to build the new image. In this case, we are using the node:16 image, which contains the Node.js 16 runtime environment. The WORKDIR instruction sets the working directory for the container. The COPY instruction copies the package.json file and the entire contents of the current directory into the container. The EXPOSE instruction exposes the specified ports on the container. In this case, we are exposing ports 3000. The CMD instruction specifies the command that will be run when the container is started. In this case, we are running the npm command with the start script. Build the Docker image. Once you have created the Dockerfile, you can build the Docker image using the following command: docker build -t my-app . The docker build command builds a Docker image from a Dockerfile. The -t flag specifies the name of the image. In this case, we are naming the image my-app. Run the Docker container. Once you have built the Docker image, you can run it using the following command: docker run -p 3000:3000 my-app The docker run command runs a Docker image. The -p flag maps the specified ports on the host machine to the exposed ports on the container. In this case, we are mapping port 3000 on the host machine to the corresponding ports on the container. Once the Docker container is running, you can access the React.js UI app at http://localhost:3000. To share the Docker container image with others, you can push it to a Docker registry, such as Docker Hub. Once the image is pushed to the registry, others can pull it down and run it.

Building a Docker container for my react.js app Read More »

Scroll to Top